Showing posts with label earrings. Show all posts

Monday, March 19, 2018

Fused Dichroic Glass Statement Necklace And Earrings: Making a glass jewelry set


Since I didn't keep up with this blog for a few months, I'm still catching you up on what's happened in my jewelry-making life. Well, last fall, my glass jewelry was accepted into Vermont Artisan Designs Gallery in Brattleboro, VT.

Brattleboro is a cute, artsy town that's known for its eclectic stores and galleries. On the first Friday of each month, there's a festival and gallery walk, where stores open late and attendees can enjoy free concerts, food samples, etc. We were fortunate to be there for First Friday in August when we visited my sister-in-law and her wife.

After scarfing down a delicious shake and fries at Brattleburger, we attended a classical music concert that was held in the atrium of a nearby mall. The musicians played antique instruments, including a flute from the 1700s. This was particularly interesting for me since I'm a flautist.

We then took in a different "concert" of sorts and joined the town's "Ukulele Flash Mob," which was held in the little park in the center of town. This was exactly what you'd imagine: about 200 people -- all with ukuleles -- played songs together or sang, as we did. It was really bizarre, but amazing, and I'll admit, I shed a tear when the group performed "Over The Rainbow" by Hawaiian artist, Iz.

We finally went on the gallery walk and stopped in Vermont Artisan Designs. The store is full of gorgeous pieces made by local artists, including glass sculptures, pottery and paintings. They also sell jewelry and I purchased a pair of dangling sun and moon earrings. Jon then said to me, "You should sell your stuff here."

Remember, this was the summertime, so I was in shorts and a T-shirt, with my messy hair pulled back. I also had a couple of stains on my shirt from Brattleburger. In other words, I wasn't exactly dressed to impress. Still, I figured I was IN the store, I might as well ask about selling my items. So I showed a few pictures of my work to the manager and she was impressed. She said that they do accept pieces from New Yorkers and suggested I send in some items to the owner. I'm all about taking chances and cold calling. And while I don't recommend "selling" yourself when you look like a mess, I do recommend that you speak up and go after a goal.

Long story short: I did, and he accepted me into the gallery! I made a few more items for the store, but wanted to have one eye-catching statement piece. That ended up being this "fingers" necklace with matching earrings:

This took me a few weeks to complete because I had to cut each strip and then make the chain. It's heavy! But I know some women who love substantial jewelry, and this is for that person.

No that the weather is getting warmer and the days longer, I'd love to return to Brattleboro and actually see my work in the store. Oh, and to see my sisters-in-law, of course.

You can find many more of my pieces on my website, Naomi's Designs.

Monday, August 7, 2017

Silver wire wrapped jewelry set with fused dichroic glass necklace, earrings and bracelet


This weekend, Jon and I visited family in Brattleboro, Vermont. It's a small, artsy town filled with galleries and funky shops. We happened to be there for the monthly "First Friday" celebration, so we took in a ukulele flash mob (so much fun!), a chamber music concert, and then went on the gallery walk.

While on the walk, we stopped by an artisan gallery that's filled with handmade crafts made by local -- and out-of-town -- artists. Most of the work is stunning; there are clay vases, blown glass sculptures, paintings ... and jewelry. I was surprised to see how reasonably priced the jewelry was and ended up purchasing a pair of earrings. Jon then said to me, "You know, you should see if you can get your stuff into this store."

At first, I said, "No" because I was dressed very casually in shorts and a T-shirt, and figured that they only accept Vermont-based artists. But then I was like, "What the hell? I'm IN the gallery and the worst that can happen is I'm told, 'No, thanks.' It won't kill me to ask."

So I did and got an enthusiastic response from the clerk. She was impressed with my glass pieces and handed me an application, explaining that their submissions are juried. I'm fine with that. I just want the opportunity to try.

One of the pieces I plan to submit via photo is this abstract glass jewelry set. I actually made this to include in my application for the upcoming local art festival, but now it will serve a second purpose. Hopefully, it will yield positive results for both the store and fair:

I've made several other jewelry sets, but this one is more complex. This is seven layers of fused dichroic glass, both etched and clear. I carefully planned out how to place each layer, so I could get that particular abstract design.

The earrings and bracelet were harder to design than the pendant because they're smaller. I had to alter the pattern a bit so I could fit the layers into a tinier space. I also used fewer layers -- five for each instead of seven -- because I didn't want the earrings to be too heavy. Still, the designs work as one whole concept, even if the individual pieces aren't completely matchy-matchy.

Since so much is going on in the design, I went with a simple silver wire wrapped chain and band. I added in a couple of spirals to complement the pattern, but didn't want to go overboard with the crystals or geometric shapes.

A lot of people call my glass pendants "stones," which is incorrect. I have to explain that they're not actually stones, but glass cabochons, which I cut, shaped and fused. However, I really do think this pendant resembles a stone -- perhaps an opal?

This year has been all about stretching myself as an artist and businesswoman. My efforts have been paying off, but I still have a lot of work to do. It would be wonderful if I could get my jewelry into this gallery. I'd be in great company.

Check out the rest of my jewelry at Naomi's Designs and MayaGirl Creations.

Friday, December 16, 2016

Silver and pink wire wrapped dichroic glass jewelry set: fused glass necklace and earrings


This week, I had dinner with an artist friend and explained to her how to set up an Etsy shop. I suggested that she create some smaller, less expensive paintings to round out her collection, which includes large, expensive pieces. Granted her paintings are gorgeous and with the months of work she put into them are worth the money she charges... but if she's selling online, she'll need to expand her market if she wants to make steady money from her art.

When it comes to my jewelry, I'm basically the opposite as my friend. I use inexpensive materials and charge pretty low prices for my items. I don't use real gemstones in my work and my prices reflect my pieces for what they are: fun costume jewelry.

However, I've been offering some bigger ticket glass items, mainly in the form of jewelry sets... and to my surprise (and delight), they've sold quickly. Each time I've posted a jewelry set on Etsy, it's been purchased within a month of being listed. My husband's advice: "Well, that means you should make more!" Duh, right?

I don't want to slap any old set together just to make money. These pieces take a long time to complete and I only sell the ones I'd wear myself. For all of the pieces I list, I have a lot of reject pile projects, as well. Sometimes my friends want those, so my effort wasn't a total waste!

I recently finished a new set using just two kinds of dichroic glass: mirrored silver and crinkle-cut pink. I call these necklace and earrings my Pink Lady piece:

When I have a pile of colorful glass in front of me, it's difficult not to reach for every shade and pattern. I like this simple striped design, though, and how only two glass layers are used. I've added another clear layer to the silver, but I don't like how it looks. Most colors turn shiny and sparkly when they're under clear glass, but the silver becomes muted. I prefer it when it has that metallic sheen.

I wasn't going to add the Swarovski crystals, but there's a tiny burn mark on the pendant. The piece looks OK when it's bare, but the pink crystals add some pizzazz -- and cover that imperfection. I then wire wrapped the earrings so they'd go with the pendant.

Because dichroic glass has so many unique patterns, it can be difficult to find jewelry that matches. Offering jewellery sets is the logical way to go! Check out my handmade pieces at Naomi's Designs and MayaGirl Creations.

Wednesday, August 3, 2016

Adventures in teaching jewelry making: making handmade beaded earrings and rings!


Yesterday was my second jewelry-making class for seniors. I think it went very well!

Last month, the four ladies who I worked with requested that I show them how to make rings and earrings. So I bought some French hook and clip-on earring backs and figured I'd teach them how to make a few different kinds. When I showed up to class, though, there were now 10 women waiting for me. Gulp... I mean great!

I wasn't expecting to have such a large turnout and I had to hustle. I passed around my giant bag of beads and let the students choose which ones they wanted for their project, while I quickly cut wire to make earrings. I'd learned the last time that most of the seniors lack the hand strength to cut and manipulate wire, so I have to help them with a few steps. Because there were so many people there, I had to literally run around to get to everyone. I actually worked up a sweat!

It was all good, though, because the ladies came away with some beautiful pieces:

A few of the ladies really "get" jewelry making and didn't need my help that often. Honestly, the beads I brought aren't that pretty; I'd ordered a 1000-piece bargain bag of plastic bits. But a couple of women managed to find the prettiest beads and put together some amazing color combinations.

Others needed more help. Since I'm working with seniors, their levels of functionality vary, and some need more assistance. I'm happy to work with them, though. The rec director told me afterward how their last jewelry teacher would get angry and impatient with the students. You HAVE to be patient when dealing with seniors, who might have memory or cognitive issues. I keep telling the ladies that the goal isn't perfection; it's to learn something and to have fun making things by hand. As I explained to one of the women, I'd have nothing to teach if they were already experts.

The hour flew by and I loved listening to the ladies chat while they worked. Part of forming a group like this is to foster friendships and I hope that if they don't enjoy making jewelry, they're at least enjoying the companionship. One woman was funny and kept joking around as we made the rings. She'd hold up her ring and announce, "Look, I'm engaged! Let's get married!" I told her that my husband would have something to say about that. She answered, "Well, if a guy really gives you a ring like this, then he's cheap." This lady is a riot! When I said I've taught children, but this was my class for adults, she said, "We're like children." I disagreed, noting that if they were kids, they'd be throwing the beads or sticking the beads up their noses. (Side note: I actually did stick a bead up my nose as a kid and had to be taken to the hospital).

Much as the women love beading, I'd like to make different jewelry projects that are a little out of the box. For next time, I'm planning to have them make scratch-art pendants. I now know to come prepared with ready-made materials, so I'll work on some pendant bases beforehand. Basically, I'll cover a sheet of oak tag with colored crayons and then add a layer of black. I'll then cut the oak tag into small shapes -- hearts, squares, etc. -- and punch a hole in the top of each one. In class, the ladies can use a bit of wire to scratch out a design and we'll then turn their creations into pendants. This is something I did as a kid, but it's so much fun! The rec director loves the idea, but agrees that most of the women won't have the strength to scribble down the thick layer of black crayon.

I think as time goes on, I'll even have them do some art projects other than jewelry. They haven't had an art instructor at the home for a while and many miss making things. It's a fun way to pass the time and it keeps them mentally and physically engaged. I've always loved making crafts, so I'll do some research and see what types of easy projects we can make. Right now, we're meeting every month, but the rec director is thinking of having me come every two weeks.

I really hope my students are getting something out of my classes. I'm certainly learning a lot from them!

You can see my work at Naomi's Designs, MayaGirl Creations and Glass By Naomi.

Thursday, July 28, 2016

Adventures in fusing glass: making fused dichroic glass earrings with three layers


My second jewelry making class is scheduled for this upcoming Tuesday and I'm really looking forward to it! In this session, I'll be teaching the ladies how to make wire wrapped, beaded earrings and rings. Most of my students don't have pierced ears, so I purchased clip-on backs. I've never used those before, so we'll play around with them together.

Meanwhile, I've been working on some earrings of my own. Lately, I've been experimenting with different glass firing techniques, including underfiring the glass and using multiple layers. I've finally figured out how to make triple layer pieces.

I've been trying to do three-layered glass for a while, with mixed -- mostly poor -- results. The top layer of glass would move and break during firing, or the bottom layer would melt incorrectly. This was actually how I destroyed my first kiln; by attempting to fire three layers. The glass turned into a goopy, burned mess, stuck to the sides of the kiln and wrecked it.

I've since learned from that mistake and now stop the firing process midway to make sure the glass hasn't moved out of place. This way, I can guarantee the glass hasn't melted and stuck to the sides. Still, I haven't had too much success with doing three layers... until recently.

The trick is to make sure all of the pieces are even and that the top layer isn't hanging over the edges. You also need to make sure the dichros are flat. Dichroic glass comes in all sorts of forms -- thick, thin, textured, smooth... and when you place a strip of textured next to a strip of smooth, the surface isn't even. Therefore, when you try to place another layer over it, the glass will move. That said, I've found that tripling works best with small pieces and when I use only one type of glass at a time.

I've practiced this technique by making earrings, which feature dichroic glass sandwiched between two layers of clear. So far, I've managed to have a few successes:

I absolutely love that yellow-pink glass. It's fuchsia in certain lights and gold in others. And with the glass on top, it looks almost green from some angles. I'm not thrilled with the pink crinkle glass, though. It looks really pretty when it's fired as the top layer, but when it's under the clear, it has a weird distorted appearance. Still, the technique worked and I'll just have to try it with different colors to see how they fare.

In other news, I'm in talks with my local salon about them possibly selling my jewelry. I showed some pieces to the owner and she's very interested. Hopefully, we'll set up a meeting for next weeks and she'll buy some of my merchandise. I haven't had any luck with getting my stuff into stores, so I'm trying not to get my hopes up... but at least she's showed some interest. That's better than an outright "No," right?

I'll keep you up-to-date on my latest jewelry happenings. You can check out my work at Naomi's Designs, MayaGirl Creations and Glass By Naomi.

Monday, July 18, 2016

Adventures in jewelry making: silver wire wrapped fused dichroic glass jewelry set with necklace, bracelet and earrings


A few weeks ago, I got an interesting proposition from a potential customer. She asked if I'd be able to make her a custom, one-of-a-kind dichroic glass jewelry set featuring a necklace, earrings and bracelet. We discussed some ideas and I took on the challenge.

Making this set was a big deal for me, not only because this was a large order -- believe me, that's always nice! -- but because it was a chance for me to truly put my growing glass-fusing skills to the test. This woman was also the first stranger to order glass from me. I've already sold many dichroic items online, but they've all been to people I know. While I so appreciate my Facebook friends and acquaintances for supporting me, I'm happy to see my work making more of its way into the world.

This customer turned out to be a designer's dream. She communicated easily, was really nice... and had definite ideas for what kind of pieces she wanted. She went so far as to send me a colored sketch for the pendant. Now all I had to do was make this set come to life. Here is the finished result:

We began by discussing which colors she likes. She had some unusual ideas for combos: reds and purples, mixed with some patterns. She also liked this fuchsia and gold glass I have. The color is interesting, but a little odd: in some light, the glass looks neon pink, but in others, it appears to be yellow. I wasn't sure how well these colors would match up, but this woman had great ideas!

I first started on the bracelet, which was the easiest piece to make. Also, the links served as test strips so I could make sure the colors would fire properly. I made about 20 different color links and showed her the ones I thought she'd most like. She approved and the rest will be used to make other bracelets and necklace chains.

This customer really wanted red glass included in her design. I didn't have any on hand; plus, red is notoriously difficult to fire. When enameling, red tends to turn orange-y or brown, especially if you fire it for too long. However, I found two potential reds I could use: Candy Apple and Black Cherry. I hoped one would work.

Candy Apple was a dud. It's bright red before firing, but once it's put in the kiln, the glass turns orange. I tried to underfire it, but it still wasn't a pretty red. Happily, the Black Cherry worked and produced a nice, rich color. Even better, my customer loved it.

Altogether, she wanted six colors included in the piece, but also requested to keep the earrings small, at 12 mm each. I didn't want to cram six colors into such a tiny space, so I suggested that we do something funky and use three colors in each earring. They'd be mismatched, but they'd fit into the set as a whole. I came up with a design that would feature each color and prominently showed off the red she liked so much.

Now came the most difficult part: making the pendant. She'd come up with an abstract design, with the glass cut at specific angles and each color in a definite place. I made a few more test strips, making sure I knew exactly how long to fire the piece so the colors would stand out. I then set to work cutting and filing the glass. I was really pleased with the end result and said a little prayer before setting it into the kiln. I just hoped the glass wouldn't break or move during the firing process, or that the colors would end up being wrong. I was so relived when the pendant turned out just the way it was supposed to.

The customer had found me because she liked the way I wire wrapped my glass jewelry. She wanted a wrap on the pendant, so I came up with a very simple design that would frame, but not obscure the necklace. I used pink Swarovski crystals so they'd show up against the red and bring out the pink in the gold-fuchsia glass.

Now I'm just hoping that the set reaches her in the mail and she likes it in person! It took me a couple of weeks to finish this project, but the labor was worth it. I've learned so much just by making this one set. I'm now a lot more skilled at cutting glass into definite shapes and at firing the glass into definite colors. It means so much to me that this woman not only appreciated my work, but had enough faith in me as a designer to create a complex and original piece.

We just received applications for the annual art fair held in my town. Assuming I'm accepted once again, I'm excited to put my glass on display and to continue to get my name out there. I also got some good news from the rec director at the senior home: she says the women enjoyed my class and has invited me back for a second session. So far, this is turning out to be a good year for me on the jewelry front. I'll keep working as hard as I can to make the rest of 2016 a success.

Check out the rest of my handmade wire wrapped, fused glass and enamel jewelry at Naomi's Designs, MayaGirl Creations and Glass By Naomi.

Monday, June 27, 2016

Blue and turquoise enamel earrings with fine silver cloisonne and crystals


I haven't done a post on an enameling project in a while, so enamel-lovers, this one is for you! Tomorrow is our final enameling session for the summer and truthfully, I'm a bit relieved to be taking a break. The dichroic glass has kept me busy, plus I'm in the middle of working on a big project for a customer. And then I'll start my wire wrapping class in a few weeks. So I'm glad to have some time off from enameling, much as I love it.

Still, with only a few classes left this semester, I've been trying to finish some half-done pieces. I recently completed this pair of dangle earrings:

I originally planned to make three of these diamond-shaped links and then turn them into a bracelet, with the enameled pieces alternating with crystals. However, one diamond didn't turn out well, so I repurposed my design and went for earrings instead. Because holes were drilled in the tops and bottoms, I hung crystals from both ends.

The abstract design is made from fine silver cloisonne wire. Actually, it's bezel wire, which is much thicker than cloisonne. I cut it through the center to thin it out somewhat and decided to use it, anyway. I like the thick design! It gives the earrings a three-dimensional look.

Right now, I'm on the fence about signing up for enameling again this fall. I really enjoy the class and have made some great friends, but I haven't made as much money from the enameled pieces as I have from the dichroic glass and wire wrapped. Should I take the class primarily for business reasons or should I take it simply because it's fun? I guess I'll have to see how much I miss it this summer. If I find myself craving an enameling session, I'll sign up. I'm glad to have some time to think about it, though.

Check out the rest of my glass and wire wrapped pieces at Naomi's Designs and MayaGirl Creations.

Tuesday, April 26, 2016

Silver wire wrapped statement hoop earrings with antiqued beads


I got a call from a friend the other day, who said he'd found a box full of old costume jewelry in an attic. Naturally, he thought of me and figures I can take the pieces apart and use the various elements.

My first instinct was to say, "No, thanks," because I've been making more and more of my own focals and pendants. But then I thought, well, I still buy ready-made beads and it isn't like I've never re-used parts from another piece of jewelry.

<> A few months ago, I got a message from a customer who asked if I could make her a pair of statement hoop earrings. She'd had a favorite pair which she'd damaged and wanted me to create something similar. I get this type of request often and told her if it would be helpful if she sent a photo of the old pair. She did, and I got to work.

The earrings were a pretty simple hoop design with a series of silver beads in the center. The problem was, I don't own many silver beads. I just don't work with them that often. I prefer using colorful crystals so I literally only have one bag of silver pieces.

Still, I wanted to see if I could make these earrings without having to order extra materials. I found the bag of antique-style heads I'd purchased years ago. I actually think these might have been the very first beads I bought when I got into jewelry making in 2010. I took out a few that I thought would work for these earrings, but many of the beads didn't have a matching twin. The beads would look similar, but were noticeably different -- which just doesn't work for earrings.

I managed to find a few matching pairs, but still didn't have enough beads to make the pattern she liked. I then remembered the beaded necklace my aunt and uncle had given me a few years ago. This was a beautiful necklace with blue crystals and little silver spacer beads. I haven't worn the necklace in a long time and well... I cut it and took off the silver bits. They're encouraging of my jewelry career, so I knew they'd understand. Sure enough, they just laughed when I later told them.

I ended up creating the following earrings and hoped the customer would like them. They didn't really look like her old pair, but they were a similar style. It would suck if I'd destroyed my necklace for nothing!

Happily, the woman loved the earrings and sent me thank-you note saying how she was "obsessed" with my design and liked it better than the original. She then went on to explain that the earrings she'd damaged were part of the collection of a well-known reality star-turned-designer -- and that she thought I could compete with said designer. I guess this is a compliment? I'm not really into imitating popular items, though. I much prefer doing my own thing.

These earrings are pretty, though, and have a very classic look. I'm glad I wasn't able to find the exact beads so I could at least add SOME originality to them.

Check out the rest of my handmade wire wrapped, enamel and glass jewellery at Naomi's Designs and MayaGirl Creations.

Tuesday, November 10, 2015

Colorful silver wire wrapped party earrings with Swarovski crystals


The first pair of earrings I ever sold at a craft fair were these silver wire wrapped earrings with rainbow colored Swarovski crystals. I call them my "Party Earrings" because the crystals look like confetti. I love making these because I don't have a set pattern for the crystals; I simply take out a handful and sting them on the wire. I never know what combination I'll get, which means every pair is slightly different.

I haven't sold many pairs online, but I've since managed to sell a pair at every craft fair. Perhaps they don't look as interesting on Etsy, but in person, they're very colorful and fun. Many customers have said that they were drawn to them because they're different from other jewelry they've seen around.

I recently updated my collection with these variations on my "Party" line; I made the earrings using crystals in shades of purple, blue and red:

They're not as colorful as my original pair, but they're still fun and will hopefully attract people who prefer muted tones over multicolored. My personal choice is the blue. Blue is my favorite color, anyway, and I love the way the aqua and dark blue stones look when they're together.

My next craft fair is in a few weeks and I'll be selling these along with my original Party Earrings. Here's hoping my lucky streak continues -- and people like these new pairs, as well!

Check out the rest of my jewellery at Naomi's Designs and MayaGirl Creations.

Friday, January 23, 2015

Tales from enameling class: Pink and black heart and polka dot enamel dangle earrings


The winter/spring session for my enameling class started last week. I'm thrilled to be back, though I was disappointed to learn that a few of the "regulars" have moved on to other things. The good news is, we have a couple of newcomers who are really nice. One is a travel agent and the other is a travel writer. Given my love of traveling, we have a lot to talk about.

It always takes me a while to get back into the rhythm of the class and this semester is no exception. I'm already a klutz, but this past week, I took my clumsiness to new levels. First, I tried to drill a tiny copper square... only my finger kept getting in the way so I let go and the piece flew off the table. Luckily, no one was hurt! However, I accidentally burned myself when my thumb grazed a flaming hot trivet, fresh out of the kiln. Ouch! Again, I was fortunate in that no major damage was done.

By far, my biggest mistake came when I attempted to make a pair of earrings. I had some leftover small rectangular pieces and painted them with stripes of green, yellow, pink and light blue. They looked really cute; the other women in the class called them "candy earrings" because of the bright pastel colors. I was almost finished with my project, but put one earring down on the wrong side of the trivet... and it ended up fusing to the metal. Stupid, stupid, me! I had to pry off the earring with pliers and in the process, snapped it in half. Honestly, I don't know what the hell I was thinking. I guess we all have bad days, right?

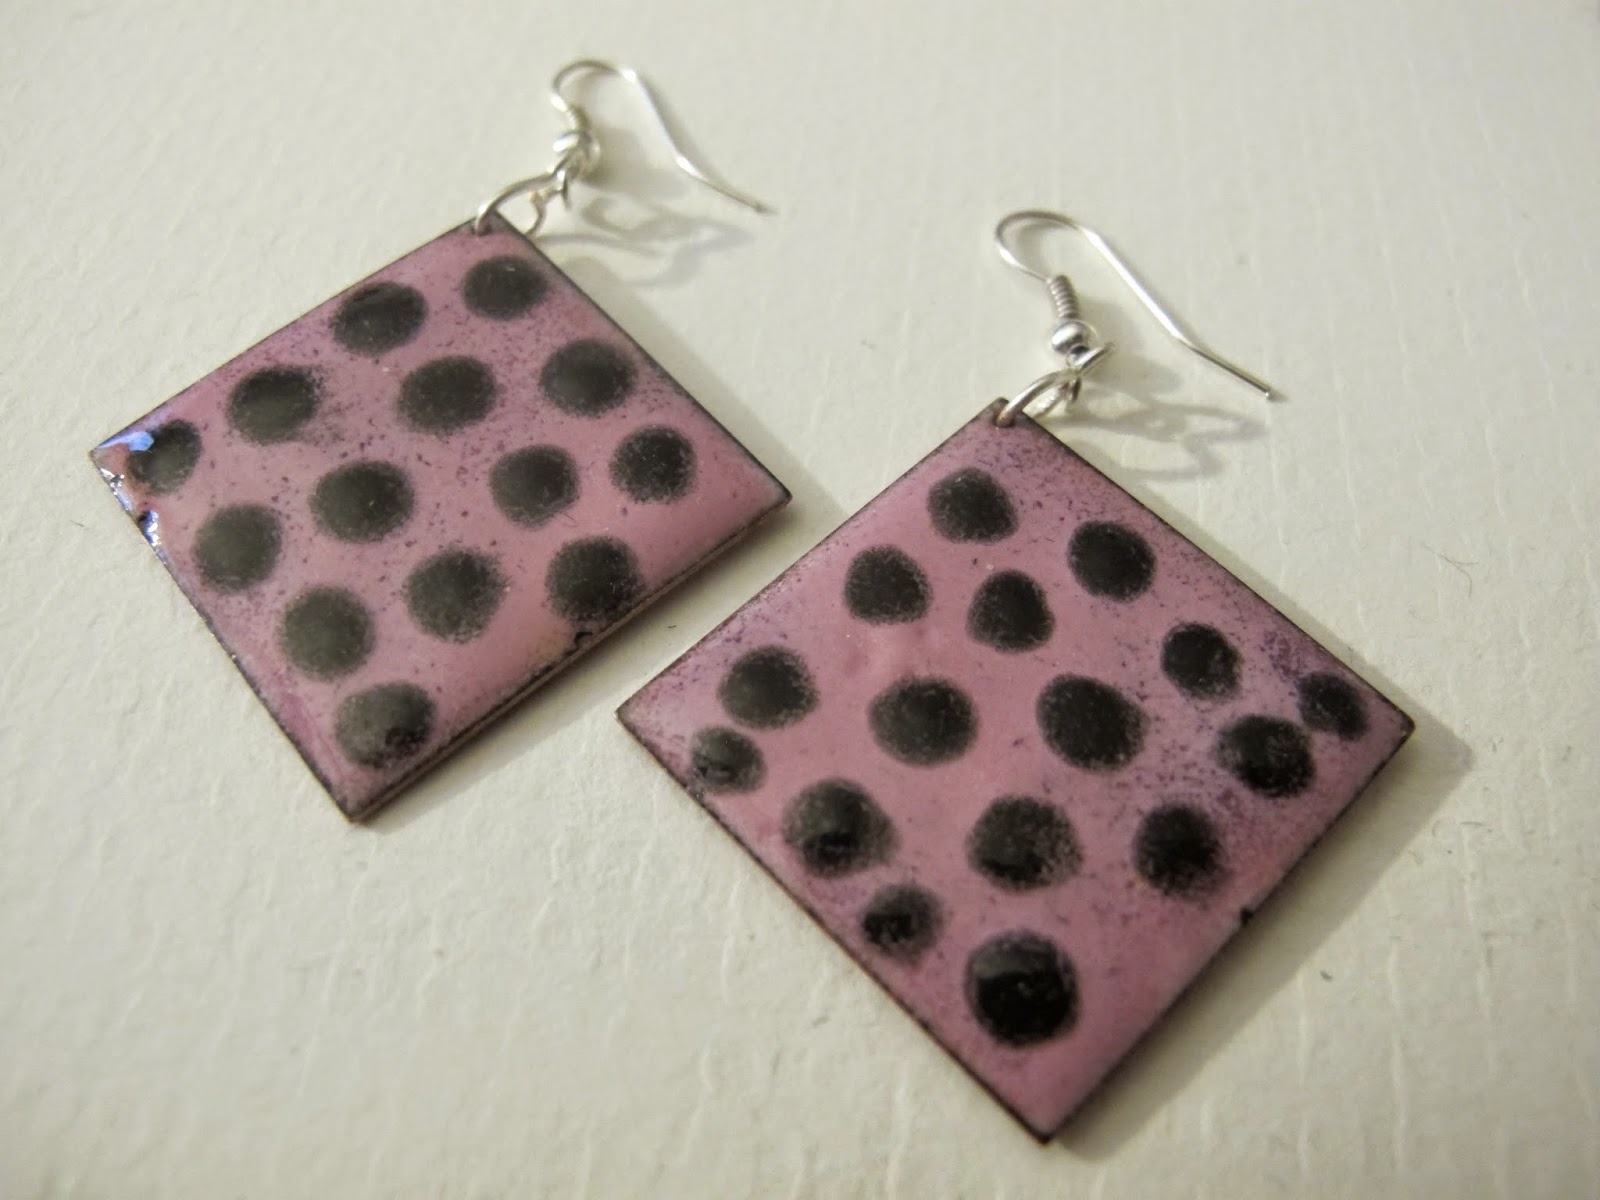
On the positive side, I now know a color combination which looks really good and I plan to make another piece using those pastel stripes. Plus, I DID manage to successfully complete a pair of pink and black heart and polka dot enamel earrings:

I'd forgotten I had a pair of copper squares and in my bag and was happy to find them. As I said to my teacher, it's like discovering buried treasure! Since Valentine's Day is on the horizon, I decided to go with a simple heart theme. I applied a layer of rose pink enamel over raspberry to get that bright pink hue and then painted a black heart on top. I then used a thin piece of wire to create that sgaffito design of swirls and scrolls. The heart's edges are a little jagged and I left it slightly underfired so it has a "stamped" appearance.

I initially planned to have a plain pink counter side, but decided it would be fun to add the polka dot design. I think it gives the earrings even more of a whimsical touch.

Now that I've made these enamel earrings, I feel like I'm back in the groove! Check out the rest of my handmade enamel and wire wrapped jewellery at Naomi's Designs and MayaGirl Creations.

Saturday, September 13, 2014

Silver wire wrapped star earrings with Swarovski crystals


One of the new items I've made are these cute, silver wire wrapped star earrings with Swarovski crystals and squiggles. I wanted to make something that's pretty and playful, and this is what I came up with:

So far, I've made these three sets ... though when I saw a larger version of the blue stars, I realized that the crystals are different colors! One earring is dark blue and light blue and the other is blue and purple. Oops! Right now, I'm listing them as a choice where people can order one set of colors or the other... but I plan to make another pair with correct color combos.

My favorites so far are the hot pink stars. I wore these last week to a friend's birthday party and they got a lot of attention! One friend couldn't understand how I could bend the wire into such precise shapes; it isn't hard with some practice. The earrings are a bit longer than what I usually wear, but they're extremely lightweight.

I'm not sure if I'm going to list these on my kids' line. I think they might be too long for younger jewelry wearers. But they're a lot of fun to make and I'm going to experiment with some more crystal patterns.

Check out my jewellery at Naomi's Designs and MayaGirl Creations.

Monday, October 21, 2013

Silver wire wrapped, copper and enamel champleve earrings with Swarovski crystals


I really like making champleve pieces and as time goes on, I'm getting better at this technique. My most recent creation is this pair of earrings, which are copper, wire wrapped with silver and Swarovski crystals:

The beauty of champleve is that you create an inlaid design that shows off the metal against the enamel. My teacher remarked that these earrings really show a lot of metal, but I like that there's a such a wide "frame" around the enamel portions.

For the enamel, I applied stripes of purple and blue glass. One of my classmates said that it looks as if the copper has been inlaid with opals. That wasn't what I was going for -- I was just experimenting with colors -- but hey, I'm glad that they're pretty!

My one disappointment with these is that I wish they were a little more lightweight. I used 16 gauge copper so they're a bit bulky for my ears, but I know plenty of women who like sturdy statement earrings. And these definitely make a strong statement!

To purchase my jewellery, head to Naomi's Designs or MayaGirl Creations.

Wednesday, January 16, 2013

January gallery of handmade earrings


January is only half over, but I've been super busy! I've been on an earring-making spree this month and while I've showed photos of all of these in previous posts, here they are in a gallery. All are available at Naomi's Designs or MayaGirl Creations.

Tuesday, January 15, 2013

Silver cloisonne and enamel heart earrings


It's less than a month 'til Valentine's Day and I'm continuing to build up my stock of holiday-related products. I'm not a huge fan of V-Day; truthfully, I think that you should celebrate your love for someone every day of the year. On the other hand, I really like hearts so I'm happy to have an excuse to make heart-themed jewelry!

My enamel teacher suggested that I start making things other than individual pendants so I can get used to designing series, so I made a pair of cloisonne heart earrings. They're a pretty simple design -- a deep red heart with a pink and purple background -- but they're sweet and pretty, and appropriate for Valentine's Day.

Of course, being well, me, the process of making this didn't go smoothly. First, I dropped one of the little cloisonne hearts on the floor of the studio. Before I knew it, everyone in class was on their hands and knees as they scrambled around looking for it. I felt pretty embarrassed, but it was kind of them to help out. We never did find the heart, but it wasn't a big deal; I just made another.

Then, for some reason, the purple counter that I used (the enamel put onto the underside of the earrings) glazed over into a lumpy mess. I guess I put it on too thick in some spots? I ended up applying a third layer (usually I use two layers of counter) and that seemed to do the trick. It's still lumpy, but there are no cracks. I added an additional layer of glass powder to the front side to even things out, so hopefully, the enamel will hold steady all around.

One good thing is that I've become much more skilled at adding the cloisonne wire. The first few pieces I made fell apart somewhat because the wire was overheated and melted. But I now know to take the piece out a bit before a minute is up. This seems to do the trick!

I wish the earrings' colors were better in this photo, but it's dark and rainy here and I was eager to show these off. If it's brighter tomorrow, I'll try to get an improved pic. Still, you get the basic idea. I'm pleased with how my earrings turned out and am all set to begin my next project: a bracelet with enamel and cloisonne links!

To purchase my jewellery, head to Naomi's Designs. To purchase my children's jewelry, head to MayaGirl Creations. To purchase my novel, check out REVENGE OF A BAND GEEK GONE BAD.

Wednesday, August 8, 2012

Handmade silver earring hooks

When I began making jewelry and was still a beginner, I purchased as many parts as possible, including the findings. This way, when I made earrings I wouldn't have to worry about constructing the ear wires. As time went on, though, and I became more experienced, I made more and more parts for my pieces. These days, I make everything from scratch if I can (obviously, I can't craft my own Swarovski crystals).

Now that I know how to make my own earring hooks, they're actually fairly simple to design. The trick is to get them even so you don't have one earring that's longer than the other.

Given that I've made probably about a thousand of these hooks, I'm doing a little experiment and am seeing if I can sell a few supplies on Etsy. Until now, I've only sold finished products that are ready to wear, but many artists come to the site to look for inexpensive supplies -- like earring hooks.

This may not be my most exciting venture, but it's these little parts that are necessary for making jewelry. Where would a jewelry artist be without jumprings? Or a painter without brushes, for that matter. I'm always trying new things to improve my business, so we'll see how this goes!

To purchase my jewellery, head to Naomi's Designs. To purchase my children's jewelry, head to MayaGirl Creations.

Saturday, February 11, 2012

Earrings Silver Chandelier Filigree With Purple Swarovski Crystal Hearts And Sterling Silver Saucer Beads

I finally learned the proper name for that curly-cue lattice pattern I like to use so much: filigree. Apparently, filigree designs were popular in ancient Indian art; you also see a lot of it in old Irish designs.

Once again I crafted filigree earrings (I like saying the word now that I know it) and made a variant on my chandelier heart earrings. This time, I used very sparkly purple AB Swarovski crystal hearts and hung them from longer hooks so they really dangle. I also added little silver saucer beads for an extra bit of elegance.

I'll admit that I make a lot of these filigree designs because it's fun to sit there and make loop after loop; it's very relaxing. But I also like the idea of having a series. Every artist has one special type of design, right? Maybe this is mine.

To purchase my jewelry, head to Naomi's Designs on Etsy.

Wednesday, February 8, 2012

Heart Of Gold Earrings: Silver Chandelier Statement Earrings With Gold Swarovski Crystal Hearts And Sterling Silver Beads

These silver chandelier earrings are super-luxurious. They're the type of jewelry that you wear to a wedding or a prom. I'm not kidding when I say they're statement earrings: they're over four inches long and just skim the shoulders. They're MEANT to be noticed.

I got the idea for them when I purchased these gorgeous gold Swarovski crystal hearts. Who knew they came in gold? By now you must know how much I love, love, love Swarovski hearts and I just had to do something special with golden ones. Talk about being a gold standard, ha ha.

I used my famous lattice design for both parts, only the top has nine loops and the bottom, sixteen. I then attached the hearts and sterling siver saucer beads to long strands of wire. The result is these crazy, over-the-top chandelier earrings. I'll be honest, I was tempted to add a third layer with a 20-loop lattice, but stopped when they hit my shoulder. There's that old saying about wearing jewelry, about how you should always remove one item. I think that goes for making jewelry, too!

To buy my jewelry, check out Naomi's Designs on Etsy.