Tuesday, December 27, 2016

Photo gallery: Handmade abstract fused dichroic glass jewelry sets


Happy holidays, everyone! Merry Christmas! Happy Hanukkah! Joyous Kwanzaa! Happy New Year!

I hope you're all having a great holiday season, no matter what you celebrate. We always go to our friends' for Christmas, but this year, we brought a menorah so we could light the candles for the second night of Hanukkah. We really enjoyed combining our holidays and sharing traditions with our friends.

I couldn't take too much of a break, though, because December is always my busiest month -- and this year hasn't disappointed. I've had a lot going on with my jewelry and my music. This week, I had three holiday performances and on Friday, I'll be ringing in the new year (a touch early) by playing a local coffeehouse. This is something I've been wanting to do for a long time. I love performing for seniors, but I'd also like to branch out and play for other groups. This won't be Carnegie Hall, but it'll give me a chance to entertain the people in my neighborhood and to try some different types of music.

I'm also working on various jewelry projects. People seem to like my glass jewelry sets, so I've made a few more of those. What I like about these is that they give me a chance to work on certain skills. For instance, that abstract set with the chunky blue and purple pieces was slightly underfired to give it that very textured appearance. That glossy pink and green set with the dots is called "Midnight At The Oasis" and was made with three layers of glass. I've gotten much better at firing the glass at even intervals so it results in a smooth finish, as you can see. The blue and pink wire wrapped set was made with transparent glass, which again, gives the piece an interesting looking finish.

As always, I have more projects in the works, so please check in regularly. And don't forget to check out Naomi's Designs and MayaGirl Creations.

Monday, December 19, 2016

Abstract heart mosaic necklaces made from fused dichroic glass


I'm still learning how to cut glass into exact shapes because I find it difficult to score glass on a curve. It's much easier to cut it on angles. Therefore, I sometimes "cheat" and use pre-cut shapes for my base glass.

I love hearts, so I recently made these glass heart mosaic pendants:

These guys are about 1 3/4 inches by 1 1/2 inches. I'd purchased smaller hearts earlier in the year and all but one have sold. I wanted to try working with a larger canvas.

I may have saved some time by using pre-cut glass, but getting the mosaic shapes to fit is still pretty labor intensive. I had to make sure each piece fit and a lot of snipping and filing was involved. I wanted the pieces to fire evenly and not break, so I put them in my kiln for 15-20 second increments. This takes time, but I like using this method because I can remove the glass at the exact right moment. I generally start with 30 seconds, just to heat the kiln, and then fire at 15-20 second intervals. I put on my gloves and protective eye wear, and lift the kiln after each interval so I can see where the glass is on the firing schedule. With an industrial-sized kiln, you'd set the timer on a schedule so the glass slowly cooks over the course of several hours. Since I don't have that option, this is my modified version of that process -- and it works!

I LOVE these pendants, though. They're so colorful and pretty. I gave the one with the red section to my friend Nancy for Christmas. And I wore the one with the orange and green swirls. I'm actually thinking of keeping it. Imagine that? Me keeping a piece of my own jewelry!

Nancy was excited to receive her heart because she'd purchased one of the smaller mosaics from me. She likes to layer necklaces so her plan is to wear the bigger heart on a long chain and then pair it with the smaller heart, which she'll wear on a shorter chain. I'll have to get her to model the jewelry for you.

Because I love these hearts so much, I ended up buying huge pre-cut pieces that are several inches across. I hadn't realized just HOW large they are, but they're coaster-sized. Way too big to wear as pendants! I've worked on one so far, just to see what it would look like, and think these could make nice holiday ornaments -- or even year-round suncatchers. I mean, Christmas ornaments don't HAVE to be in the shapes of trees or gingerbread people, right? Sure, hearts are associated with Valentine's Day, but this is supposed to be a season where one celebrates love and family. Why not a big heart?

Check out the rest of my handmade jewelry at Naomi's Designs and MayaGirl Creations.

Friday, December 16, 2016

Silver and pink wire wrapped dichroic glass jewelry set: fused glass necklace and earrings


This week, I had dinner with an artist friend and explained to her how to set up an Etsy shop. I suggested that she create some smaller, less expensive paintings to round out her collection, which includes large, expensive pieces. Granted her paintings are gorgeous and with the months of work she put into them are worth the money she charges... but if she's selling online, she'll need to expand her market if she wants to make steady money from her art.

When it comes to my jewelry, I'm basically the opposite as my friend. I use inexpensive materials and charge pretty low prices for my items. I don't use real gemstones in my work and my prices reflect my pieces for what they are: fun costume jewelry.

However, I've been offering some bigger ticket glass items, mainly in the form of jewelry sets... and to my surprise (and delight), they've sold quickly. Each time I've posted a jewelry set on Etsy, it's been purchased within a month of being listed. My husband's advice: "Well, that means you should make more!" Duh, right?

I don't want to slap any old set together just to make money. These pieces take a long time to complete and I only sell the ones I'd wear myself. For all of the pieces I list, I have a lot of reject pile projects, as well. Sometimes my friends want those, so my effort wasn't a total waste!

I recently finished a new set using just two kinds of dichroic glass: mirrored silver and crinkle-cut pink. I call these necklace and earrings my Pink Lady piece:

When I have a pile of colorful glass in front of me, it's difficult not to reach for every shade and pattern. I like this simple striped design, though, and how only two glass layers are used. I've added another clear layer to the silver, but I don't like how it looks. Most colors turn shiny and sparkly when they're under clear glass, but the silver becomes muted. I prefer it when it has that metallic sheen.

I wasn't going to add the Swarovski crystals, but there's a tiny burn mark on the pendant. The piece looks OK when it's bare, but the pink crystals add some pizzazz -- and cover that imperfection. I then wire wrapped the earrings so they'd go with the pendant.

Because dichroic glass has so many unique patterns, it can be difficult to find jewelry that matches. Offering jewellery sets is the logical way to go! Check out my handmade pieces at Naomi's Designs and MayaGirl Creations.

Wednesday, December 14, 2016

Enamel sugar skull hair clip with fused dichroic glass beads


My customers are constantly challenging me to think outside the box -- which I love. I'm pretty creative, but I enjoy it when others come up with a great idea for me to work with.

A friend of a friend recently commissioned me to make a Christmas gift for his daughter: a colorful enamel sugar skull barrette.

I haven't made too many accessories outside of the usual necklaces, pendants, earrings, bracelets and rings, but I was eager to try. I purchased some barrettes from the drugstore and got to work.

I didn't want to make the skull too big since it's going to be worn by a little girl. I wanted it to be comfortable in her hair and to not get tangled. I made a smaller version of the sugar skulls I've made for pendants and fastened it at the end of the clip.

Her dad asked that I make the piece very colorful, so I tried to think of patterns that a girl would enjoy. I added little hearts for eyes and rainbow stripes. Not all girls are traditionally "girly," so I didn't want to go overboard in using pinks and purples.

Once the skull was attached to the barrette, there was a lot of extra room, so I added a few glass beads to complete the design. I really like how I have two kinds of glass work on the piece: the enamel and dichroic. They mix well and I really should combine them more often.

I wasn't sure if I wanted to return to my enameling class this semester, but went so I could work on this skull. I ended up making two other pendants and a pair of earrings, so it ended up being worth my time. I'm still not sure what I'm going to do for the spring, but I'm not quite ready to say good-bye. I can't enamel at home because I don't have the space for a proper kiln and I would miss it if I weren't able to do it. It's just been harder to find time to squeeze in the class between my other jewelry work and musical gigs.

Anyway, I hope this girl likes her Christmas gift. I always get a little nervous when people buy my work for someone's birthday or as a special present. Hopefully, my skull will make her the best-dressed kid in her grade school. :-)

Check out the rest of my handmade jewelry at Naomi's Designs and MayaGirl Creations.

Tuesday, December 13, 2016

Teaching Dichroic Glass Jewelry at the Cemetery!


Yep, you read that correctly: this past weekend, I taught a glass-making class at the local cemetery, Maple Grove, in Queens, NY.

Maple Grove was established in 1875 and is on the list of National Register of Historic Places. It's a non-denominational cemetery and among the many notable people buried there are singer Lavern Baker, aviation pioneer Charles Manley and Jacob Riis' wife, Elizabeth Riis. My good friend, Suzanne, who died in 2014, is also there.

Friends of Maple Grove (FoMG) offers various cultural programs, such as concerts, classes and even a murder mystery dinner, all which honor the history of those resting there or the Victorian Era. I was invited to teach glass-making as part of the latter. Decorative glass was trendy during Victorian times and many of the old homes in our area are adorned with elaborate glass windows.

Maple Grove isn't that big, but has two buildings: the old administration building and the large, modern art center. Concerts are usually held at the Center, but I had the class at the older building.

The place is amazing! The home is filled to the brim with historic knickknacks and costumes. FoMG puts on performances where players dress in old clothing and there's plenty to choose from.

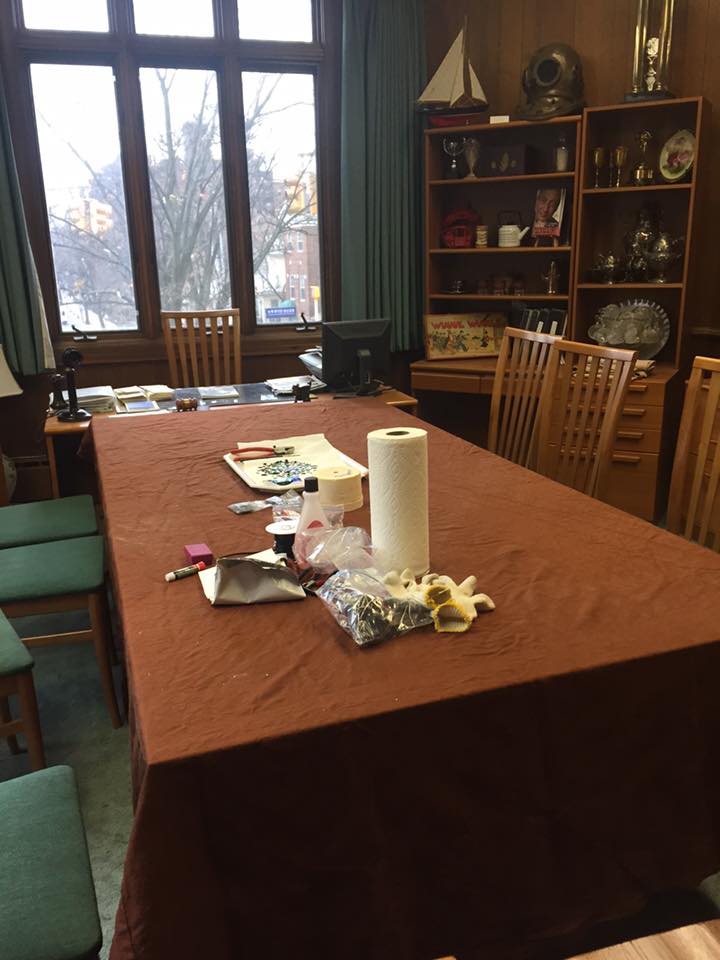
We didn't dress up, but the organizers, Helen and Carl, set up the event so it was a class/tea party. We used beautiful China and snacked on an assortment of tiny cakes and cookies. Carl suggested we work in the back room, which is larger and a bit less cluttered than the entrance area. We were surrounded by historic pieces, including a Civil War-Era tea set.

Helen picked up two microwaves for me so I could fire multiple pieces at once. I also purchased a second kiln, which is about four times the size of my other one. There were nine students in this class, but I was able to fire six pieces at once and save a lot of time.

Since this was a beginner class, I had my students make simple mosaic pieces. I pre-cut the glass shards and black bass pieces, but I let each woman try her hand at cutting the glass herself. I love working with the seniors, but there's only so much they can do. These students were much more involved in the process.

Once each made her glass pendant, I taught them some very basic wire work and showed them how to make a spiral necklace bail. So they learned two skills for the price of one class.

I couldn't believe how quickly the two hours flew by! At one point, I was running back and forth between the two rooms as I checked the kilns and was also trying to help the women with their wire structures. I actually broke a sweat! We all had a wonderful time, though, and everyone was very pleased with her piece. I always enjoy watching my students' faces as they see the glass turn molten for the first time. They never quite believe me when I warn that the microwave kiln heats to 1500- degrees, but when they see the glowing, red glass, they get it.

A couple of funny things happened during our time there. Carl brought his little dog, Sky, along. He's adorable and was well-behaved, but at times, it seemed as if he wanted to join us in making art. Also, at one point, a couple of other Maple Grove members stopped by to check out costumes for a future event. I was by myself in the front room as I checked the smaller kiln and turned around only to see the two guys dressed in velvet robes and ornate crowns. "What do you think?" one asked, with a grin. "Too much?"

I was a little nervous about teaching this class, but no one was burned or cut (always a possibility when working with glass) and everyone had a great time. The students kept telling me how wonderful the class had been and a couple purchased pieces from me. One said that she might have another job for me, teaching glass to her church group. And Carl and Helen have invited me to return! The ladies were asking if we could do a class once a month and if we could also do a wire-wrapping session. I'd love to do more, but I'm not sure if Maple Grove had the time or space. I'd be happy to teach a few times a year.

It's funny because both of my parents were teachers and I swore I'd never follow in their footsteps. You know what? I love teaching. I'd never want to work in a traditional classroom, but I enjoy sharing my art with others. It thrilled me to see these women fall in love with glass.

Here are some shots from the day. You can see the rest of my work at Naomi's Designs and MayaGirl Creations.

Saturday, December 3, 2016

Handmade fused dichroic glass jewelry: working with glass decals


It's been almost a year since I started making glass pieces. To date, this is my favorite jewelry discipline. I love wire work and enamel, but I'm happiest when I'm fusing glass.

I still have a lot to learn and am constantly experimenting with new techniques. Lately, I've been playing with glass decals. In April, I'll be selling my pieces at a Tarot fair, so I plan to have jewelry that resonates with this particular audience. My glass pendants will be adored with celestial symbols, Zodiac figures, Trees Of Life, etc. You can pretty much cover any interest with decals!

Hundreds of different decals are available on specialty sites and even Amazon, which has a surprisingly thorough collection. They're super easy to use: you soak the decal in warm water for about 30 seconds, gently peel off the backing and carefully apply the decal to the glass. Once the decal dries -- usually after a few hours -- you can fire it onto the piece, making the design permanent. So simple! Or so I thought...

I purchased several decal packs, including cats, sun and moon figures and fairies. As soon as they arrived, I eagerly got to work sticking decals on pieces, but I really should've watched an instructional video before digging in. For my first attempt, I heated the decal onto a piece of unfired glass, which you aren't supposed to do. The glass fused, but the decal burned, leaving a black mark on the surface.

Next, I correctly added the decal to a piece of already-fused glass... but this time, I heated the glass too quickly and it snapped in half. Damn!

Since the decals look best with solid backgrounds, I purchased beautiful fuchsia and gold glass. Unfortunately, the glass kept cracking in my kiln. I finally tried a new technique where I very slowly heat the pieces, 15-20 seconds at a time. It's a time-consuming process, but the glass heats evenly and doesn't break. I'm also doing this with the decals, so that they don't burn.

I'm still making some mistakes: there were a couple of pieces where the decal was underfired and rubbed right off the glass. The sun and moon figures have a backing and a coating on the front, which I hadn't realized, so my first attempt at firing them resulted in my pieces catching fire. But I'm learning! I'm practicing and am getting there, and as you can see from my above photos, have managed to create some beautiful pieces.

I've just ordered a couple more packs: inspirational words, like "Love," "Hope" and "Piece" and designer hearts. These decals add a fun, new dimension to my glass and it's been worth the effort to work with them.

Check out the rest of my handmade wire wrapped, fused glass and enamel jewelry at my WEBSITE/STORE or Naomi's Designs and MayaGirl Creations.

I Was Screwed Over By PayPal


I usually try to keep this blog upbeat and focused on my jewelry, but I had a really bad experience with PayPal a few weeks ago and feel the need to share it.

PayPal basically acts as a "piggy bank" for funds; customers pay you through the site and you can then transfer your funds to the bank. However, you can also use it as a monetary source. For instance, when I took those glass classes last year, Brooklyn Glass only accepted PayPal, so I simply sent the funds from my reserve.

For the most part, I hadn't had any difficulties with PP, but trouble began a couple of months ago. I received several "invoices" from a stranger requesting that I send him money. The requests were ignored and deleted. I called PayPal and they simply advised me to change my password and security settings, which I had already done.

Next, someone hacked into my page and used my PP for $3 worth of online games. I am not a gamer, so this was definitely not me. I again changed my password and security, and called PP. They said they'd "look into it," but their "investigation" concluded that I was the one responsible for purchasing the games (I wasn't, I swear!). I kind of laughed it off -- I mean, it was $3 -- but their refusal to truly investigate annoyed me.

Well, in October, on our way up to Maine, where we were seeing family, I received an email saying that my PP funds had successfully been transferred to my bank account. Um... what? I hadn't transferred anything. Not yet, anyway.

Turns out, someone again hacked into my PayPal and listed a new bank account under MY name -- and took all of my remaining PP money. The bank used is legit, but it's a chain that my husband and I had never heard of, and is located in Alabama. Remember, we live in NY.

I called PayPal, hoping to straighten this out, but was on the phone for about an hour -- mostly on hold -- as I was shuffled from one department to another. Finally, I was put in contact with a representative from their fraud department. I explained the situation, but her conclusion was that because my name was on the account, it meant I'd made the transfer.

I kept trying to explain how we'd never heard of this bank, how the criminal obviously had the foresight to create an account with my name on it (and used his or her real name at the actual bank), how she should examine the IP address, call the bank, etc... but she refused to cooperate. Then she became angry with me when I got upset. She kept saying, "This is how we do it at PayPal, it's our policy." Shouldn't your policy be protecting your customers?

Frustrated, I hung up on her and called the bank to see if they could help me out. They confirmed that neither I or my husband have an account with them... but because I'm not a client, wouldn't send me a written letter stating that I'm not a member of the bank.

I'm not sure what actions I can take from here. In the end, it wasn't that much money. It was enough so that it stung, but I'm not going to go hungry or miss bill payments, or anything like that. I'm just disappointed in PayPal for not doing more to work with and protect their customers. One of their biggest boasts is that they're a "secure" site and obviously, they're not. Unfortunately, PayPal basically has a monopoly on online commerce. I know there are other programs out there like Google Wallet, etc., but Etsy uses PayPal as an option and many of my customers -- on and off Etsy -- prefer making their purchases through the site.

Part of this is my fault. I've learned that expensive lesson that money is definitely NOT secure sitting in a PP account and from now on, any sales that come through that site will immediately be sent to my bank. I should have done this from the beginning. Stupid me! Still, I wish PP would treat their customers with some more respect and really try to work with us on our problems rather than automatically assume we're in the wrong.

So if you use PayPal, let me be an example to you of what can go wrong. Do NOT keep funds in your account. Transfer them to your bank ASAP. Don't make the same mistake I did.