A few weeks ago, I wrote a blog post about working on your goals and making your dreams come true. Well, I wrote a more detailed version of that article for HubPages!
Here is the full version if you'd like to read it:
Naomi's HubPages Article
Thursday, March 29, 2012
Wednesday, March 28, 2012
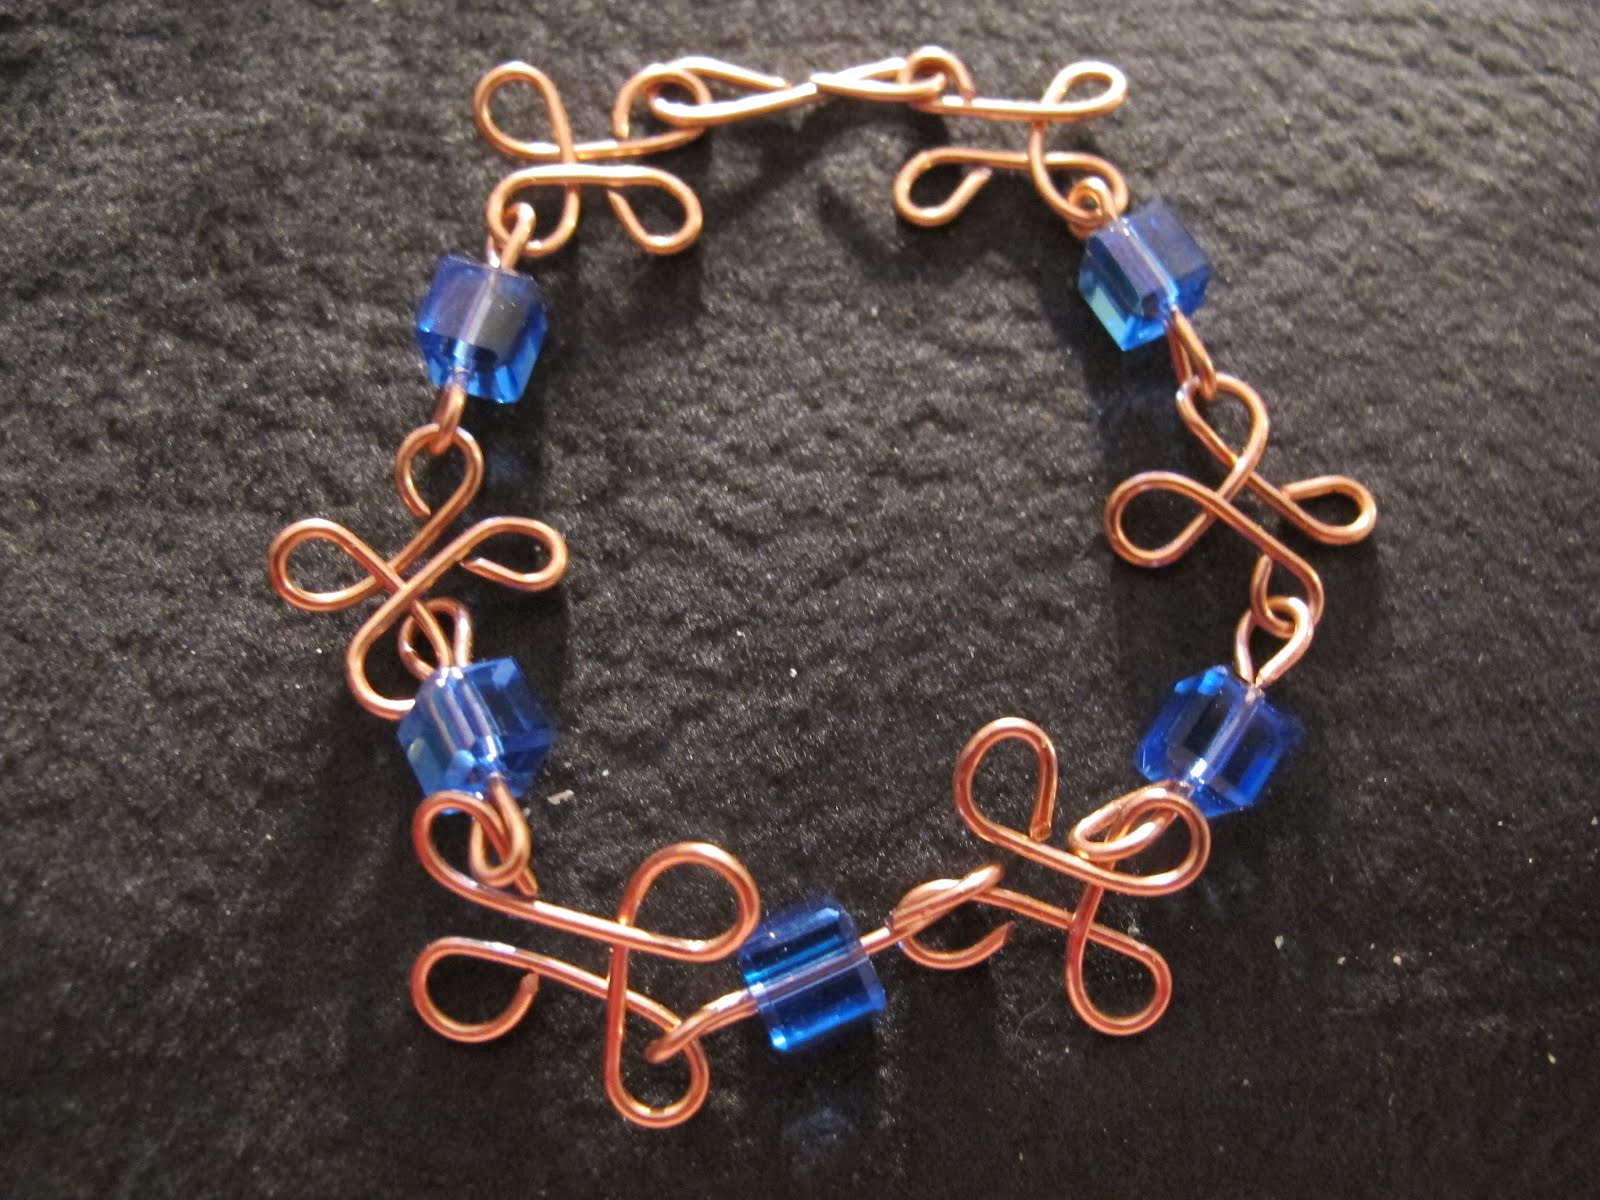
Wire wrapped jewelry patterns: make a wire wrapped copper bracelet
Good news! I am now sharing my jewelry making secrets on HubPages.
As I explained in my earlier post, I am now freelancing/designing jewelry full time. That said, I'm combining both of my skills and am writing instructional articles for simple wire wrapped jewelry projects.
The first project is a copper bracelet made of four-leaf clover links. It's really cute and easy to do. For more information, head to my HubPages article.

To purchase my jewelry, head to Naomi's Designs on Etsy.
As I explained in my earlier post, I am now freelancing/designing jewelry full time. That said, I'm combining both of my skills and am writing instructional articles for simple wire wrapped jewelry projects.
The first project is a copper bracelet made of four-leaf clover links. It's really cute and easy to do. For more information, head to my HubPages article.
To purchase my jewelry, head to Naomi's Designs on Etsy.
Monday, March 26, 2012
Mixed Metal Copper And Silver Jewelry Pieces
Now that I'm taking a metalsmithing class, I have so many more ideas for pieces. Being able to saw and drill jewelry is a useful skill and gives you so much more room for creativity. That said, I'm now making a series of mixed metal jewelry pieces made of copper and silver.
One is this copper heart that's wire wrapped with silver. I decided to combine my skills and created an industrial looking heart that hangs from a silver chain. That chain is handmade, too, by the way, and took a million years to make. Sawing the heart was a challenge because you have to get that top curve and the indentation, but I like how it came out:

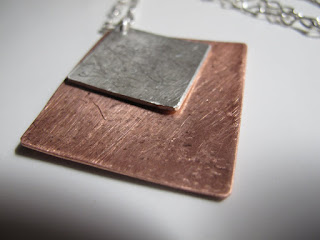
The next piece I made consists of a small silver square hanging over a larger copper square. I turned each on an angle to make them look like diamonds and hammered each to give them texture. This chain is also handmade. One thing to note: silver is harder than copper so it takes longer to saw. It also takes much more force.
This piece is very abstract, but I love the combo of the metals. I plan to get some brass sheets, too, so I can play around with those.
To purchase these pieces or my other jewelry, head to Naomi's Designs.
One is this copper heart that's wire wrapped with silver. I decided to combine my skills and created an industrial looking heart that hangs from a silver chain. That chain is handmade, too, by the way, and took a million years to make. Sawing the heart was a challenge because you have to get that top curve and the indentation, but I like how it came out:

The next piece I made consists of a small silver square hanging over a larger copper square. I turned each on an angle to make them look like diamonds and hammered each to give them texture. This chain is also handmade. One thing to note: silver is harder than copper so it takes longer to saw. It also takes much more force.
This piece is very abstract, but I love the combo of the metals. I plan to get some brass sheets, too, so I can play around with those.

To purchase these pieces or my other jewelry, head to Naomi's Designs.
Metalsmithing Class: My sterling silver ring with flower design
Here it is! Here is the mythical silver ring that I have been talking about all semester:

While I don't think it's my best piece, I'm proud of it. For a seemingly simple ring, a lot of work went into making it! First, I had to carve out the silver strip using a jeweler's saw, then I had to drill and saw out the flower design. Next, I had to file the entire piece. I then annealed the ring by torching it so that I could make the metal more flexible; next, I bent it into a ring shape.
Next, I soldered the ends together, then annealed it a second time. Finally, I sanded, polished and buffed it.
So there were a lot of steps in making it -- and it doesn't even fit me. It's about a half size too small (though it's sligtly big on my pinky). So if anyone reading is a size 8 1/2 ring wearer, you can buy it on Etsy.
To purchase more of my jewelry, head to Naomi's Designs.
Sunday, March 25, 2012
Metalsmithing Class Part VI
Last Thursday was a weird day for me. That morning, I was laid off from my job. Also, it was about 80 degrees out in March in New York City. Still, instead of just going home and enjoying this freakishly beautiful weather, I stayed in the city and went to my metalsmithing class that night.
During the day, I stayed in my husband's office and turned his conference room into a studio. I had all of my jewelry making equipment with me so I spent the afternoon carving shapes out of 20 gauge copper sheet metal. This gave me a chance to practice my sawing techniques.
I'm getting better at sawing metal, though it's still time-consuming. The diamond I made took me about an hour to cut, but sawing out a heart was much more of a challenge. I had to get that inner curve and the dip at the top of the shape, and that took a lot of work -- but I got it!
Since I didn't have a drill on hand, I improvised and used my center punch tool to create a little hole at the top of each shape (to string a chain or jumpring). The metal warped a bit from this, but I plan to hammer the cut-outs, anyway. I think I'll then wrap some silver wire aound them.
That night at class I did .... more sawing. This time, I sawed my cicular pendant. I sawed and sawed and I'm still only about 3/4 of the way done! And I still have to saw the inside. I guess I have the time to do some work at home now.
Our teacher showed us how to put a stone into a bezel setting and how to use a buffing machine. Working with the bezel seems a little complicated so I hope I don't mess up that part. The buffing machine is just scary; it's like a mini car wash for jewelry.
Our semester is more than half over so I really hope I can finish my pendant in time. Our last class is May 17 and I have a craft fair on the 19th. I'd love to have it ready for sale by then.
To purchase my jewelry, head to NAOMI'S DESIGNS.
Making Jewelry Full-time
Well, I have some big news: I was just laid off from my day job, which was writing for a soap magazine. Our company shut down two out of the three magazines that were a part of the soap group and had to let a bunch of people go. I'm in good company in being unemployed.
I'm going to miss my work friends very much, but fortunately, I have a lot of plans for the future -- so many in fact, that it's kind of overwhelming. I woke up this morning in a panic thinking, "Oh my God, how am I going to get all of this stuff done?" But then I thought, "Wait; I now have the time to do anything I want!"
Of course, at the top of my list is improving my jewelry business. I've been adding more and more items to my Etsy shop and plan to call some stores to see if we can set up meetings. I've been pleased with how the jewelry is going as a hobby, but I'd like to reach a point where I turn a profit. Right now, I'm still spending more than I'm making and need to catch up. I'm looking forward to working on my jewelry and writing full time, but need to make sure that I make at least *some* money and spend some time around people so that I'm not completely isolated.
I've also been trying to diversify my jewelry styles and jewelry business. The metalsmithing class is helping (I'll post some pics later when my pieces are complete) and, as you saw from my previous entry, am now making rings. Here are a few of the copper wire wrapped coil rings I've recently made:


To purchase my jewelry, head to NAOMI'S DESIGNS.
Sunday, March 18, 2012
Wire wrapped chandelier earring design gallery
By now, I've created an extensive collection of wire wrapped chandelier earrings with Swarovski crystal hearts and filigree design. I think I've used every color imaginable! But here's a look at them all together. To purchase any of them, head to NAOMI'S DESIGNS ON ETSY.


Subscribe to:
Posts (Atom)